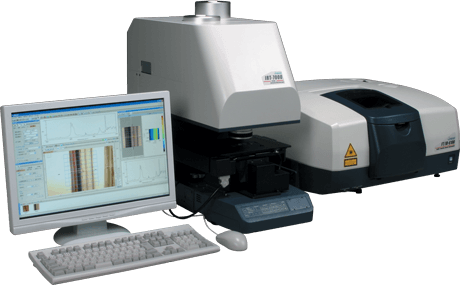

An FT-IR microscope, which does not require any sample preparation, is an important accessory for the JASCO FT/IR instruments and it is used worldwide more frequently for the analysis of microscopic materials. Among the FT-IR microscopes offered by JASCO there can be found the Irtronμ fitting in the sample compartment of the FT/IR-4X/6X/8X spectrometers and the IRT-5000 and IRT-7000, which are stand-alone microscope units but they use the spectrometer’s light source and interferometer. The control of the microscopes is provided by the Spectra Manager 2.5 software package, which controls all the JASCO spectroscopic instruments.
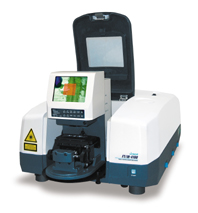
Irtronμ

The Irtronμ microscope allows the measurement of area of 100×100 μm (if using the optional MCT detector the area is of 20×20 μm) in the infrared range by using the light sources, the interferometers and the detectors of the instruments while fitting in the sample compartment of the FT/IR-4X/6X/8X spectrometer. The built-in CCD camera through the 5″ LCD monitor implemented on the microscope provides the positioning of the sample on the manually moveable sample stage. This CCD camera is capable of transmitting real-time images of the monitored area even during the spectra measurements. Beside the transmittance and reflectance modes, it is also possible to use ATR lenses mounted with germanium, zinc-selenide or diamond prism.
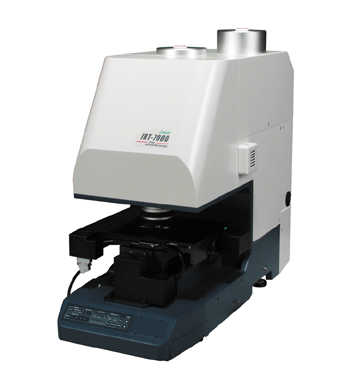
IRT-5000 and IRT-7000
The IRT-5000 and IRT-7000 FT-IR microscopes featuring excellent optical properties, also contain technical novelties that enable them to be used by university/academic  research laboratories, forensic, pharmaceutical, and other laboratories dealing with a wide variety of materials not only for research work but also for quality control. The FT-IR microscopes are able to measure in transmittance, reflectance and ATR modes, as well. The instruments use the light sources and interferometers of the FT/IR-4X/6X/8X spectrometers but have an own detector. Thus in case of standard FT-IR instrument with mid-band MCT detector the usable wavenumber range is between 7800 and 650 cm-1, which can be changed and expanded with the use of the proper optical components. With the Cassegrain objectives of 32x magnification the minimum measurement area can be 3×3 μm. Both instruments include the IQMonitor function in the standard configuration. With this function, the measurement and the monitoring of the measured area can be observed simultaneously. The latter one can be done not only in transmittance and reflectance modes, but with the use of the new Clear-View ATR lenses also in ATR measurements. The IQMapping function enables multi-point mapping of the given surface without moving the sample stage even with base units equipped with an MCT detector. The IRT-7000 instrument, including the 16-channel linear array MCT detector, is capable of the “imaging” measurement of the surfaces with the spectrometers containing the rapid scan function.
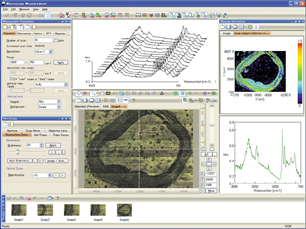
Spectra Manager 2.5
 The Spectra Manager 2.5 software package controlling the FTIR microscopes includes all the functions necessary for controlling the instruments (measuring parameters, the selection of the measurement area, focus, sample stage movement, mapping measurements). During the measurements the image, transmitted by the CMOS camera, and the registered spectrum can be seen at the same time. The analysis module contains mathematical functions necessary for spectrum evaluation and processing, extended with functions for the processing of the results obtained during the mapping measurements.
For the measuring range expansion of the FTIR microscopes there are available detectors, lenses and other accessories. The instruments in their standard configuration are capable of transmittance and reflectance measurements. However, with traditional and the new “Clear-View” ATR lenses, they can be suitable for reflection measurements, as well. With the “Clear-View” ATR lenses the surface of the sample can be observed during the ATR measurements, too. Thus, the user can be sure that the measurement is done where it is desired, even on a microscopic scale.

